Description
Water Feature Installation Guide:
Introduction:
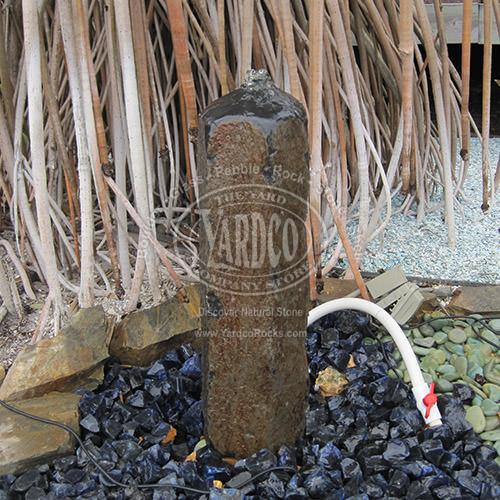
Hi, my name is Clive Ebersold and I’m the Sales Manager at Yardco Rock & Stone, the best stone yard in Boynton Beach, FL. Today I wanted to discuss Basalt water features. Basalt is a dense, hard material that naturally forms into column shaped towers. These columns are then cored to be made into the water features you see today.
People really love the water features, and we often get asked about them, but they can be intimidating to homeowners due to their weight and because there are not a lot of installers that have knowledge of installing them.
Being that I have installed them in the past, I wanted to create a video to help show the process of the installation, the order in which the steps occur, and tips and tricks that I have learned throughout the years of installing and handling these basalt columns.”
Preparation and Understanding:
We need to answer some questions first to make sure we’re able to install one of these Water Features.
- First, where will you be placing the feature at your home? This is important because we need to know if the area is suitable and accessible enough for a feature. You want to have enough area for the feature to “create a splash” and not too little area where the majority of the water leaves your basin and you run into the constant refilling of the basin. A typical area needs to be a minimum of 2’ off in all directions of your basalt feature or features.
- What size feature or features are you planning on using? As you know the taller the piece, the heavier and more difficult it’s going to be to handle. This involves the first question again of where you want to place it at home because if you want it in front of the house, chances are it will be easier to place a larger piece rather than if you have to place it in the back of the house where smaller piece might be more manageable. Please consider that you might have to sneak by the A/C unit, or walk around the edge of a pool, or only have a standard 3-foot gate to get through where machinery cannot pass. Not to mention that the ground might be uneven or less than desirable to move heavy objects over.
- Are you able to dig in the area you’re considering? There could be sprinkler lines, old stumps or root systems, gas lines, water lines, fiber optics and much more. It’s up to you to determine if the area is safe to dig in. You can call 811 before you dig, and they will come out and mark all your lines not including sprinklers.
- Is there power nearby? The pumps that we supply with our pump kits have 20’ of cord which plugs into a standard 110 outlet.
- Do you live in an HOA? This question is often not thought of but is an important one to ask. Each HOA is different, some more lenient than others. It’s important to research with your HOA what is allowed and not. Keep this in mind because there have been several instances where a customer has assumed that “it would be fine” and then happen to be paying for someone to remove the product, pay to deliver it back, and pay in restocking fees because they assumed that it was fine. This even includes the back of the house. Some HOA’s have complete say and authority of what is permissible even in a fully private and enclosed backyard.
- Lastly, who is installing this? If you’re planning on installing the Basalt Feature(s), you should have answers to all these questions. The hardest part of the installation, which is also one of the last steps, is can you handle and maneuver the piece into its final spot? A key thing to understand is that basalt weighs 120-150 lbs. per foot in height. So, yeah, you might have your eyes set on that 6’ feature because it has great impact and would look sweet in your backyard but are you prepared to handle a 720-900 lb. piece.
Steps of Install:
Step One:
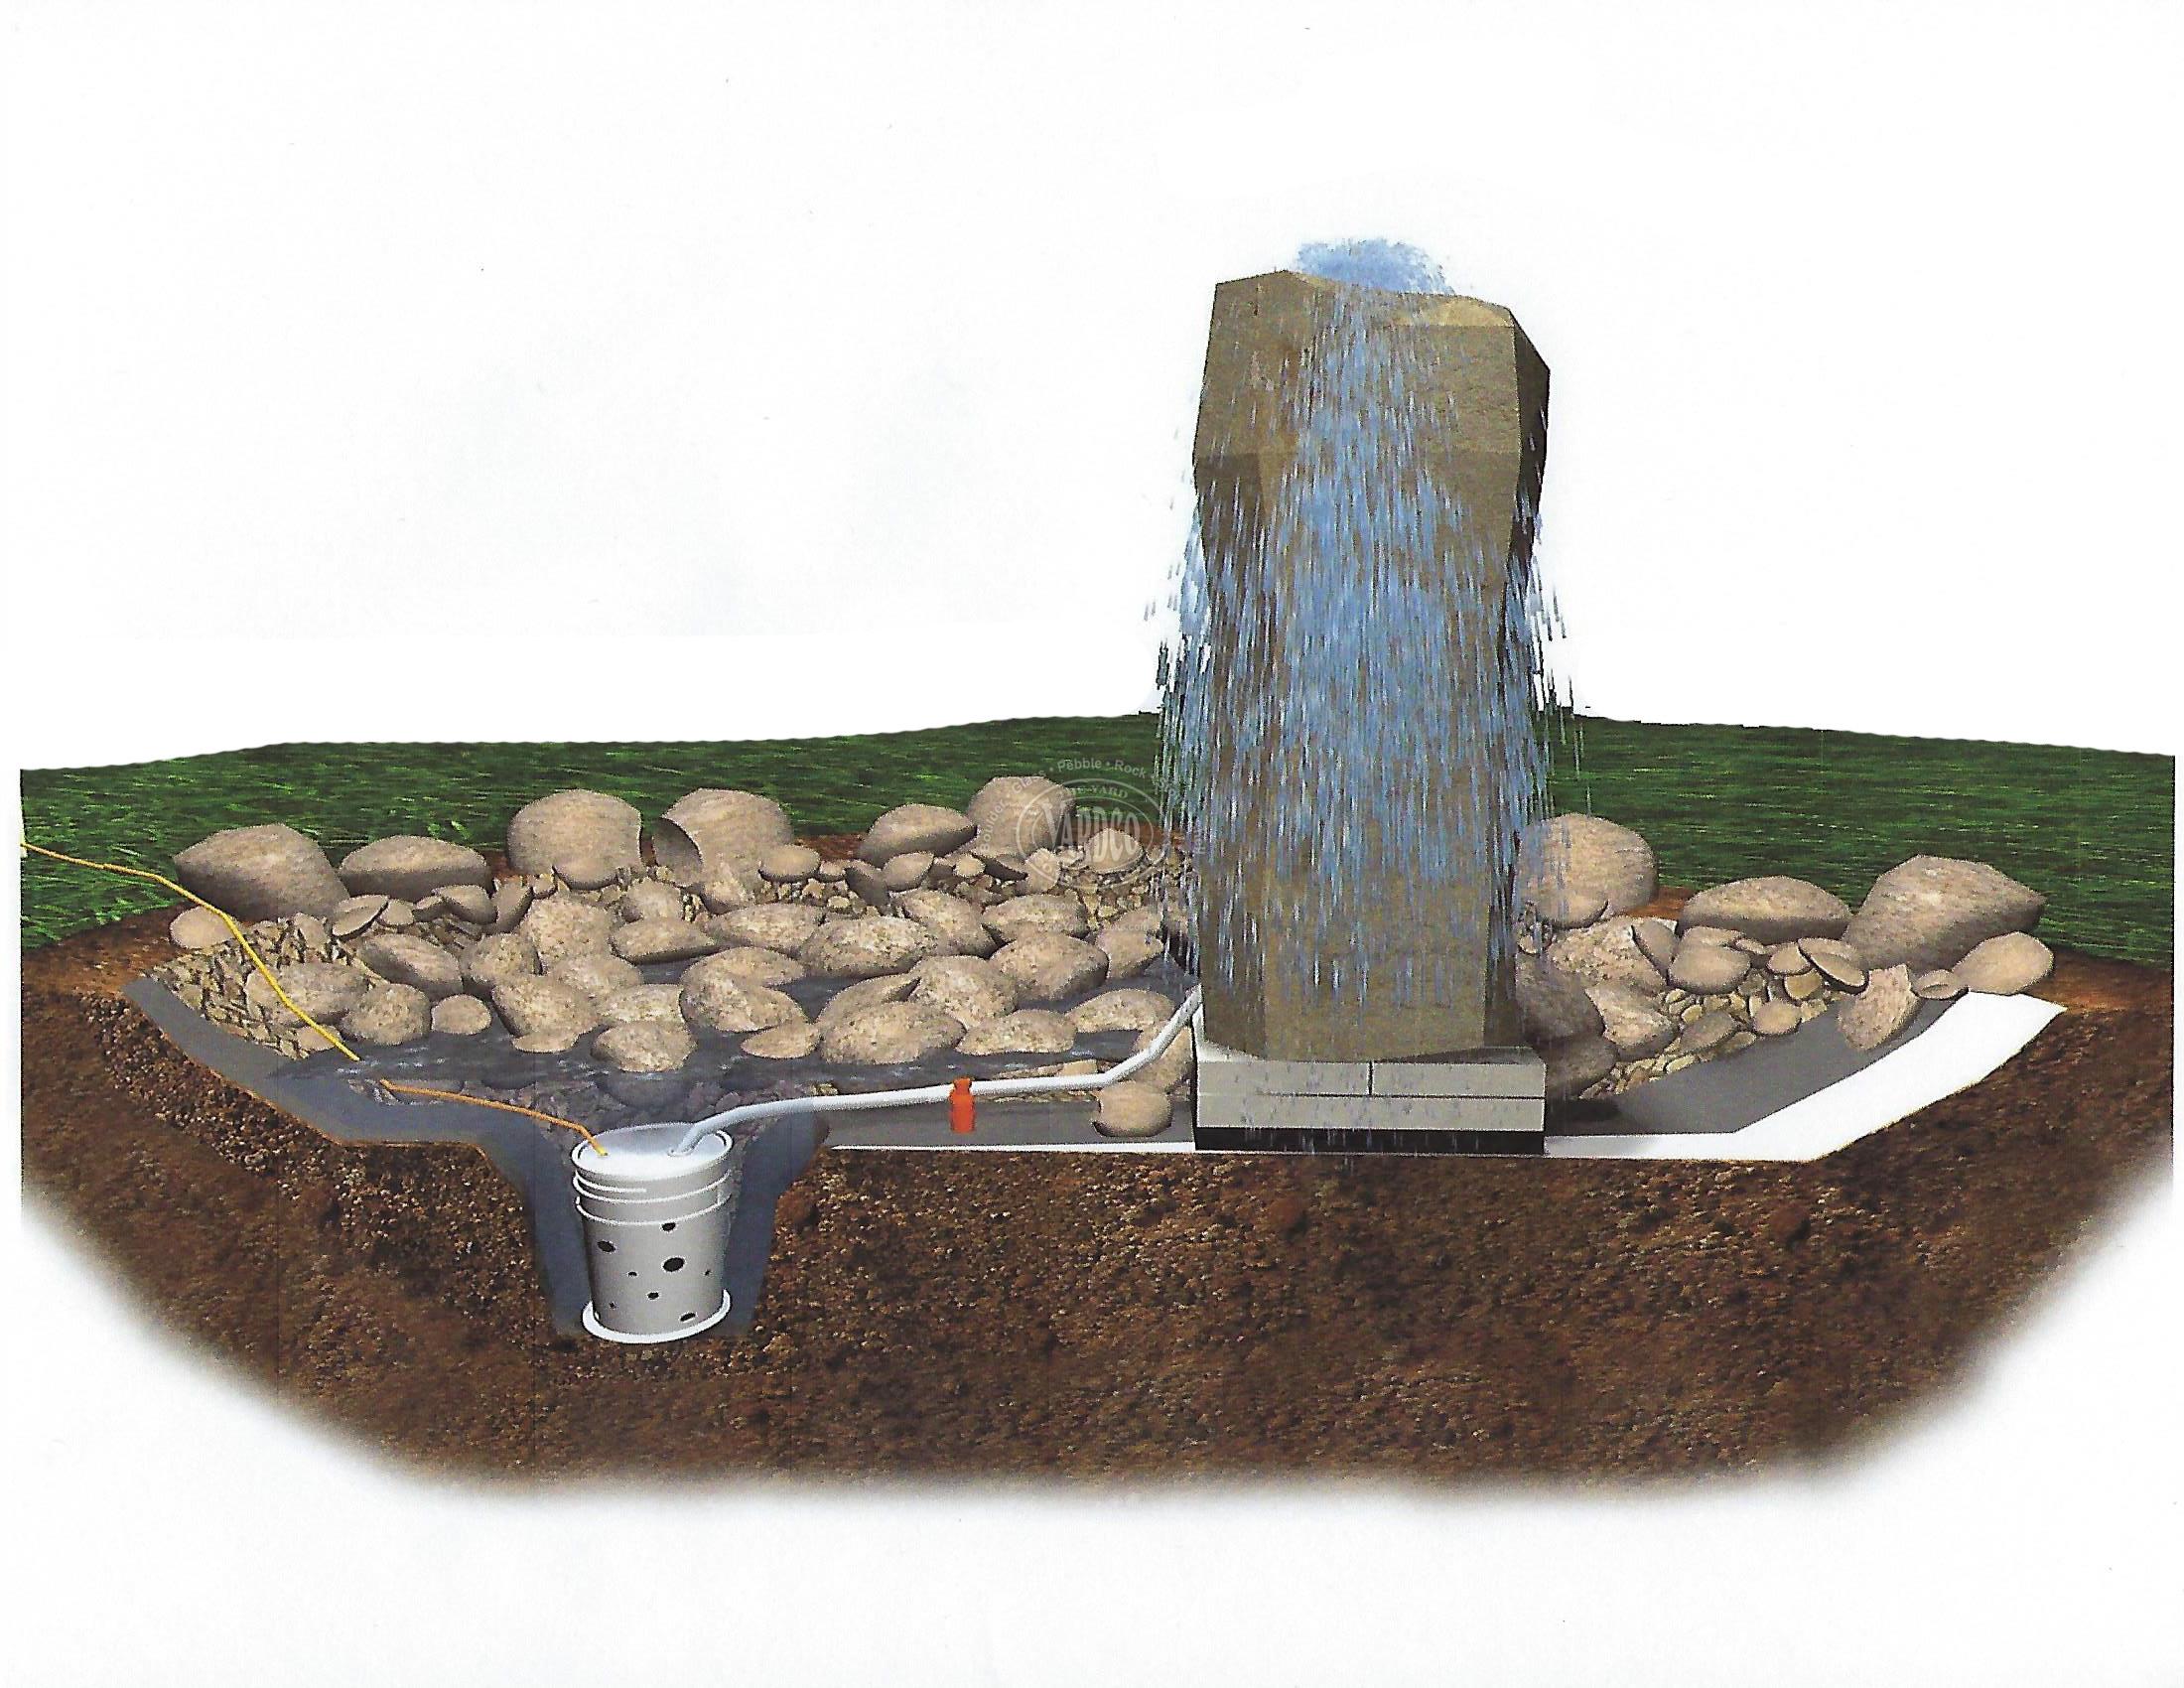
- Dig out the hole that will act as the basin:
- Begin by digging out the hole. You want to dig a large enough hole where you will retain ample water reserve and you want it wide enough to recollect the water that it sprays out. We typically recommend that you should go 2 feet off in all directions from the piece. For example, if your piece is about 1 foot in diameter then your hole should be about 5’ wide (assuming you want the feature to spray at full pressure).
Step Two:
- Dig out the additional depth for where the Pump Bucket will sit:
- Once you dug the hole, you will need to dig some additional depth where the Pump Bucket will sit. Be sure to think about the best place to put the Pump Bucket that will give you ease of access and also sit off the receiving end of the Basalt Feature. Being that the Pump Bucket is about 16” in height and 12” in diameter, we will want to make sure to dig another 8”- 10” in depth to ensure it sits underneath the rock level. Also consider making that area about 14” wide so that there is a 1” cushion surrounding the bucket to ensure that water can flow easily on all sides. Once finished, take a look around the area and make sure there aren’t any rocks, roots or chunks of hard materials that can potentially cause a puncture in your liner.
Step Three:
- Line your hole with your underlayment:
- Using the thick cloth-like material, stretch it over your hole evenly and start tucking the underlayment starting with the pump bucket area. Slowly work your way out in all directions making folds and creases wherever needed to situate the underlayment.
Step Four:
- Line your hole with Rubber Liner:
- Using the Rubber Liner, follow the same procedure used for placing the underlayment. Note, that you can use the Pump Bucket itself to help push the liner into the recess you created to make sure that bucket will sit into the cavity properly.
Step Five:
- Placing your Pump Housing:
- Using the bucket supplied with your “Pump Kit”, place the bucket in your recessed area. Take a shovel scoop or two of your cheap fill material and place that around the bucket to ensure the bucket has a rock layer surrounding itself. This will make sure water can flow to the pump as effortlessly as possible.
Step Six:
- Place Pump in Pump Housing
- Place the pump supplied in the bottom of the Pump Bucket. Make sure you have it set up upright. Run the pump cord through the lid and place off to the side. Next take the 1 ¼” Female Threaded Adapter and the 1 ¼” reducer and apply PVC cement to permanently join the two pieces. Next take the 1” flexible tubing and using PVC cement, apply around one end of the Tubing and insert into the reducer and adapter. Screw female adapter onto Pump and run the tubing out the lid in the same direction you ran the pump cord. Place the lid onto the pump housing and push firmly to make sure the lid has grabbed on all sides.
Step Seven:
- Place concrete blocks:
- Take the rubber matting and concrete blocks supplied with your Pump Kit and place the rubber matting where you anticipate your Basalt Feature will sit. Place your blocks on top of the rubber matting.
Step Eight:
- Fill in your area with Fill Rock:
- Start filling in the entire area with your cheap fill rock. Make sure you’re using something like Brown River Rock (shown in the video). We like this material because it’s a rounded material and its fairly cheap, which is preferred since you will not be seeing this material once the project is complete. Fill in the area until you are sitting about level with the top edge of the concrete blocks.
Step Nine:
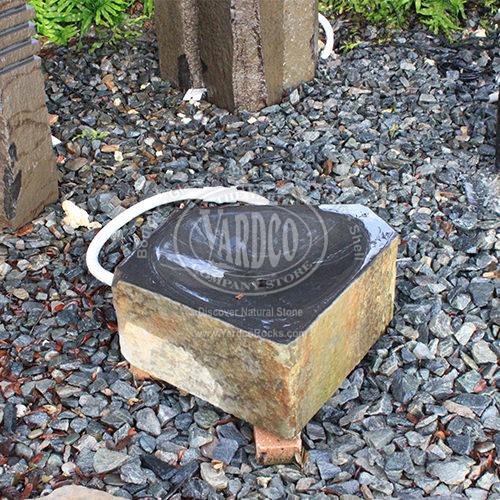
- Place your Basalt Feature(s):
- In the video you will see us place our Basalt Features using machinery. If you don’t have machinery, there are a number of ways you can still place the features using help through more people and or other tools like a Hand Dolly. If you’re using a Hand Dolly, place some ply wood on top of the Brown River Rock to make riding over the material easier. Once you’ve placed your feature or features, stand back and make sure you like their approximate positioning. You will be testing them while they’re hooked up to water as well so don’t worry about getting them perfect just yet. Add more fill material up until you’ve reached the bottom edge of the fitting.
Step Ten:
- Purging the water:
- We need to start adding water to the basin. From your garden hose, start adding water. Remember that it doesn’t matter where you are adding as long as the water is spilling into the area that’s acting as the basin. Once you see the water pooling at the top of the pebbles, go ahead and turn off the water. The water will probably look pretty cloudy due to all the dirt/fines from the cheap fill material. That is perfectly normal but need to go ahead and purge this water out. Connect your pump to power and make sure you’re running the water out of the system. Once you see that water is consisting of air, that means the pump is starting to suck air and we want to limit the amount of exposure it gets from sucking air since the pump is meant to run fully submerged under water at all times. Disconnect the pump cord from the outlet and repeat the process of filling the basin with water and purging the water out. This may take 3-4 times, but you can repeat as many times until the water is clear.
Step Eleven:
- Test run for the Basalt Features:
- Make sure everything is connected, fill up your basin with water, and go ahead and give it a test run. If you’re lucky, you already placed the Basalt Features so that they’re spilling water exactly how you envisioned. In our case, we need to make some final adjustments to make them spill how we want. Using composite shims, that you can get from your local hardware store, place them underneath the basalt to make your final adjustments. Make sure you have someone with you to brace the feature.
Step Twelve:
- Adjusting water flow:
- With the Ball Valve supplied in your “Pump Kit” you can place that on your line wherever it fits best and that will be your way of controlling the flow.
Step Thirteen:
- Final Touches:
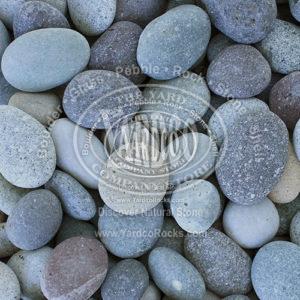
- Once you’re happy with how your features look, it’s time to apply PVC cement to the rest of your PVC items. Let those dry. Trim your liners making sure to leave some of it hanging over the edge. Add your decorative pebbles on top of your fill material. Make sure to add enough so you don’t see the fill material below.
Finished:
- Now you should have a beautiful functioning water feature creating great sounds and ambiance. If you have any questions or want to share photos of your install, please feel free to send them over to sales@yardcorocks.com.